Seiten

Montag, 26. Juni 2023

Whimsy Stamps | Mushroom in my heart


Welcome to my blog.  It is time for a new inspiration.
Herzlich willkommen auf meinen Blog. Es ist Zeit für eine neue Inspiration.

How I made this card?

Boah, the time runs insanely fast. I can hardly believe that we are already at the end of June and I show you the last card for Whimsy Stamps this month. This time I show you a quick card, at least for me ;)
I had planned a Clean and Simple Card, but I decided to go for a contrast, so I cut the front of the card and glued it on a red card. Other than that, I kept the card very simple. With the cool circle die you can put accents on the card without cutting them out... as you can see here nicely the seam.... I hope you like the idea :)

Wie habe ich diese Karte gemacht?

Boah, die Zeit rennt wahnsinnig schnell. Ich kann kaum glauben, dass wir bereits Ende Juni haben und ich Euch die letzte Karte für Whimsy Stamps diesen Monat zeige. Dieses Mal zeige ich Euch eine schnelle Karte, zumindest für mich ;)
Geplant hatte ich eine Clean and Simple Card, aber ich habe mich für einen Kontrast entschieden, so habe ich die Frontseite der Karte abgeschnitten und auf eine rote Karte geklebt. Ansonsten habe ich die Karte sehr einfach gehalten. Mit den coolen Kreisstanzen kann man Akzente auf der Karte setzen ohne, dass diese ausgeschnitten werden... wie hier schön zu sehen ist die Naht... Ich hoffe Euch gefällt die Idee :)

Products | Produkte

I link here all products, which I have used.
Ich verlinke hier alle Produkte, welche ich gebraucht habe.


Thanks for visit my blog and for your lovely comment. 
Danke vielmals, dass Du mich auf dem Blog besucht hast und für Deinen lieben Kommentar. 


Freitag, 23. Juni 2023

Whimsy Stamps | Birthday Word


Welcome to my blog.  It is time for a new inspiration.
Herzlich willkommen auf meinen Blog. Es ist Zeit für eine neue Inspiration.

How I made this card?

A birthday card with Christmas in July colors... Why not, Challenge accepted...
First I stamped the gnome on the card and then colored. Then I designed the background, now a text and then the card was also already finished... Went really fast and has mega fun. 

Wie habe ich diese Karte gemacht?

Eine Geburtstagskarte mit Christmas im Juli Farben... Wieso nicht, Challenge angenommen...
Zuerst habe ich den Gnome auf die Karte gestempelt und danach coloriert. Danach habe ich den Hintergrund gestaltet, nun noch einen Text und dann war die Karte auch schon fertig... Ging echt schnell und hat mega Spass gemacht. 

Products | Produkte

I link here all products, which I have used.
Ich verlinke hier alle Produkte, welche ich gebraucht habe.


Thanks for visit my blog and for your lovely comment. 
Danke vielmals, dass Du mich auf dem Blog besucht hast und für Deinen lieben Kommentar. 


Freitag, 16. Juni 2023

Whimsy Stamps | Gnome says Hello

  Welcome to my blog.  It is time for a new inspiration.
Herzlich willkommen auf meinen Blog. Es ist Zeit für eine neue Inspiration.


How I made this card?

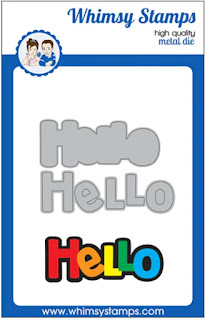
This time I'm showing the Embossing Folder Daisies and how to make a cool card with them. First I embossed white cardstock and then die cut the word with the Hello die. Now I adhered this to a red base slimline card and added the word. Now decorate with a cute stamp and stamp some plants in the background and the card is ready. 

Wie habe ich diese Karte gemacht?

Dieses Mal zeige ich die Embossing Folder Daisies und wie man damit eine coole Karte macht. Zuerst habe ich weissen cardstock embosst und danach mit der Hello Stanze das Wort ausgestanzt. Nun habe ich dies auf eine rote Basis Slimline Karte geklebt und das Wort eingefügt. Nun noch verzieren mit einen niedlichen Stempel und etwas Pflanzen in den Hintergrund stempeln und fertig ist die Karte. 

Products | Produkte

I link here all products, which I have used.
Ich verlinke hier alle Produkte, welche ich gebraucht habe.


Thanks for visit my blog and for your lovely comment. 
Danke vielmals, dass Du mich auf dem Blog besucht hast und für Deinen lieben Kommentar. 

Dienstag, 13. Juni 2023

Whimsy Stamps | Daisies Embossing Folder


Welcome to my blog.  It is time for a new inspiration.
Herzlich willkommen auf meinen Blog. Es ist Zeit für eine neue Inspiration.


How I made this card?

I love the patterned paper that shows a scene because that's how I quickly create a card, like this one. 
For this I used the cute foxes, because they fit so well in a forest. I cut the paper first the grass, then the shape. Now I glued this on a white slimline card, attaching the grass with spacer glue. The foxes sleep hidden, for this I used the leaves.... A sentiment I stamped directly on the card and hot embossed with white embossing powder.

Wie habe ich diese Karte gemacht?

Ich liebe das gemusterte Papier, welches eine Szene zeigt, denn so gestalte ich schnell eine Karte, wie diese hier. 
Dazu habe ich die niedlichen Füchse genutzt, da diese so gut in einem Wald passen. Ich habe das Papier zuerst das Gras geschnitten, danach die Form. Nun habe ich dieses auf einer weissen Slimline Karte aufgeklebt, wobei ich das Gras mit Abstandsklebern befestigt habe. Die Füchse schlafen versteckt, dafür habe ich die Blätter genutzt.. Ein Sentiment habe ich direkt auf die Karte gestempelt und mit weissen Embossing Pulver heiss embosst.

Products | Produkte

I link here all products, which I have used.
Ich verlinke hier alle Produkte, welche ich gebraucht habe.


Thanks for visit my blog and for your lovely comment. 
Danke vielmals, dass Du mich auf dem Blog besucht hast und für Deinen lieben Kommentar. 


Dienstag, 6. Juni 2023

Whimsy Stamps | Flower Puff Paper


Welcome to my blog.  It is time for a new inspiration.
Herzlich willkommen auf meinen Blog. Es ist Zeit für eine neue Inspiration.

How I made this card?

This time I have a slimline card for you. On the flower paper I cut out the flowers, then I put it on the paper and saw how the background looks, because I straightened the cut paper and extended a piece. After I liked the background, I took my die cut and trimmed it down. I still wanted a border and took the larger die cut without the pattern for this. I adhered the prepared papers to a white card blank. Now I wanted something hearty and came across this cute sheep. Actually, the sheep has a flower in his hand, but this time I wanted to make it look like he plowed a flower from the field, so I decided to use the no line technique, so I could fit the flower better. Finally a matching sentiment and the card is ready.

Wie habe ich diese Karte gemacht?

Dieses Mal habe ich eine Slimline Karte für Euch. Auf dem Blumenpapier habe ich die Blumen ausgeschnitten, danach habe ich es auf das Papier gelegt und geschaut, wie der Hintergrund wirkt, da ich das ausgeschnittene Papier begradigt habe und ein Stück verlängert. Nachdem mir der Hintergrund gut gefiel, habe ich meine Stanze genommen und es zurecht geschnitten. Ich wollte noch einen Rahmen und habe hierfür die grössere Stanze ohne Muster genommen. Die vorbereiteten Papiere habe ich auf einen weissen Kartenrohling geklebt. Nun wollte ich noch etwas herziges und bin auf dieses niedliche Schaf gestossen. Eigentlich hat das Schaf eine Blume in der Hand, doch dieses Mal wollte ich es so aussehen lassen, als ob es eine Blume von dem Feld gepflügt hat, darum habe ich mich entschieden für die No line Technik, so konnte ich die Blume besser anpassen. Zum Schluss noch ein passendes Sentiment und fertig ist die Karte.

Products | Produkte

I link here all products, which I have used.
Ich verlinke hier alle Produkte, welche ich gebraucht habe.


Thanks for visit my blog and for your lovely comment. 
Danke vielmals, dass Du mich auf dem Blog besucht hast und für Deinen lieben Kommentar. 


Samstag, 3. Juni 2023

Whimsy Stamps | Build a Fairy Garden


Welcome to my blog.  It is time for a new inspiration.
Herzlich willkommen auf meinen Blog. Es ist Zeit für eine neue Inspiration.


How I made this card?

I created the green background with my copics. I did without detailed drawings because I wanted to have the mushroom in focus. The mushroom alone looked a bit boring and so I decided to place a gnome on it. Now I punched out the background and finally inserted it into the frame. At the very end I added a matching sentiment. 

Wie habe ich diese Karte gemacht?

Den grünen Hintergrund habe ich mit meinen Copics gestaltet. Ich habe auf detallierte Zeichnungen verzichtet, weil ich den Pilz im Fokus haben wollte. Der Pilz allein sah ein wenig langweilig aus und deshalb habe ich mich entschieden einen Gnome darauf zu platzieren. Nun habe ich den Hintergrund noch ausgestanzt und schlussendlich in den Rahmen eingefügt. Ganz zum Schluss habe ich noch ein passendes Sentiment eingefügt. 

Products | Produkte

I link here all products, which I have used.
Ich verlinke hier alle Produkte, welche ich gebraucht habe.


Thanks for visit my blog and for your lovely comment. 
Danke vielmals, dass Du mich auf dem Blog besucht hast und für Deinen lieben Kommentar.