Posts mit dem Label Pumpkin werden angezeigt. Alle Posts anzeigen

Samstag, 23. Oktober 2021

Magengo Designs | Hello Fall

 Hello, Ute here. 


This time I show you a quick gift box. To decorate the Boder stamps are very good.


Now I want to tell you briefly how to make this box, so you can quickly recreate it. 

You need the following:
- 11 x 3 1/2 inch card stock (your choice).
- something to decorate, I link the products at the end
- Folding board and accessories
- scissors

Next, place the paper on the folding board so the short side is on top and fold 3/4 inch on each side. Now turn the paper and fold at 1"1/8, 5"1/8, 5"7/8 and at 9"7/8. Now fold the paper. Now cut the following points, on the long side all fold lines up to the fold vertically. Now glue them down, so that a box is formed. See illustration. 


Now, it is time to decorate the box as you like. 

I look forward to your idea on this topic. 

I used the following products:


The sentiment I used is from Stampin Up and means small winter supply.

Thanks for stopping by and for your comment below.

Hugs Ute
 

Samstag, 17. Oktober 2020

Gnome Pumpkin

 It is inspiration time, yeah.... It is October and a lot of people love pumpkins. Kids love to decorate it (sometimes they need help from adults)and I love it in the kitchen. There are a lot of yummy recipes with pumpkins. 
Es ist Inspirationszeit, wie cool... Es ist Oktober und viele Leute mögen Kürbisse. Kinder lieben diese zu dekorieren, brauchen manchmal Hilfe von Erwachsenen. Ich liebe diese in der Küche. Es gibt so viele leckere Rezepte.


I made this card as inspiration blog post for:
Ich habe diese Karte gemacht,  als Inspiration für:


How I made this card?
Wie habe ich diese Karte gemacht?

I print the gnome with my regular printer on alcohol friendly paper and colored it with Copic Markers. I add details with a pencil from Caran d'ache, called Luminance. After then I cut them out with my Scan and Cut machine. I use a blank A2 card and decided me to use a circle with glitter paper (orange). For the other circle I use Alcohol Ink and Yupo Ranger paper and make a background, then I cut them out and put all together and add the sentiment to the card.
Zuerst drucke ich den Gnome aus mit meinen regulären Drucker. Ich nutze ein spezielles Papier, auf dem ich mit Alkohol Markern ausmalen kann, es muss auch ein wenig dick sein (Spektrum Noir Papier). Danach male ich den Gnome aus mit Copic Markern und nutze einen Stift von Caran d'ache, ich liebe die Luminace, um Details und Schatten hervorzuheben. Anschliessend schneide ich das Image mit Hilfe meiner Maschine Scan and Cut aus. Ich habe mich für eine A2 (US Format) Karte entschieden. Diese ist weiss. Als Hintergrund nutze ich zwei verschiedenen Kreise (orange mit Glitzer und Alkohol Ink).  Ich füge alles zusammen und zum Schluss stemple ich das Sentiment. 


Thanks for visiting my blog. Wish you a happy crafting. 
Hugs Ute
Danke für Deinen Besuch und ich wünsche Dir viel Spass beim Basteln. 
Ganz liebe Grüsse Ute


PRODUCTS USED: 
Circle Die Cuts
Scan and Cut machine
Alcohol Inks
Yupo paper
patternd glitter paper 


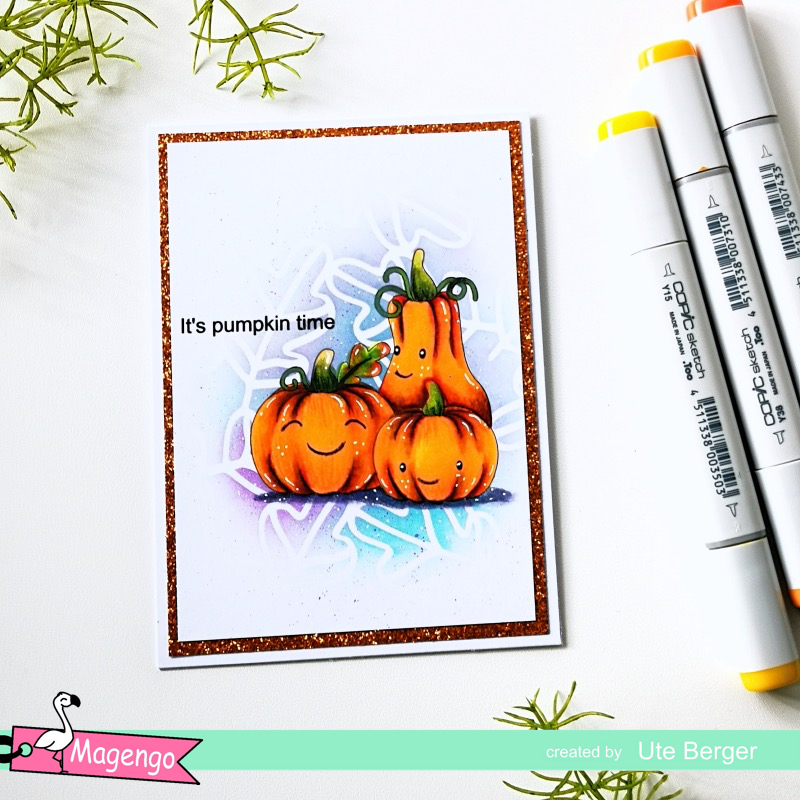
It is Pumpkin Time

  Hi again, a new inspiration from me. 

Do you remember from the inspiration last week? I show you a slimline card with a lot of pumpkins. They are so super cute I must make another card. This time I use also the Stencil from the current New Release. 


I am not a fan from Halloween, so I am glad this is a really great stamp for the fall time. 


How I made this card?

At first I arrange all images in my program and print it on card stock. This time I used the Leave stencil the first time. It is a little tricky to find the right material for the stencil. I use Acetat foil, but this is not thick enough for me, I think I will use laminated foil next time. The Acetat is thin, so I used no permanent glue spray for the stencils and for my masking (print on regular paper and cut it out).
After masking the image I use the stencil with my Distress Oxide Ink, but only around the image. not the whole card. After distressing I color the pumpkins with the same color combination like the week before.

I use an A2 card base for the card and add there a glitter paper. On the glitter paper I add the image in a smaller rectangle and finished the card.

Products I use: 


Hope you like it. Wish You a wonderful weekend. 

Crafty Hugs Ute


Samstag, 10. Oktober 2020

Autumn Greetings

  Hi there...


Today I will show you one of the cutes pumpkin stamp sets I ever saw. This set is perfect for cards around the fall time, thanks giving or birthdays or recipe cards. 
You see I have many ideas to use this set. 

This is my card I made as inspiration for you. 


How I made this card?

At first I arrange all the pumpkins I like on my card stock. I use pages for this, but you can use another program, like word for example. After then I print it out and colored the pumpkins. 
I use my Copic Markers for this.
Pumpkin: R29, YR18, YR04, Y38, Y15
green: YG67, YG 25, YG00
for shadow a pencil from Luminance, called Dark Indigo (639). For more details I used a white gel pen. I also print again the pumpkins on normal paper, for masking. So I cut all out and use a non permanent glue spray for hold the masking on the images. I use Distress Oxide Ink for the background (twisted citron, mowed lawn, tumbled glass, peacock feathers, seedless preserve) . I use my die cut from Mama Elephant Slim card basic and cut the pumpkin scene and I use als the scalloped cut die with glitter paper. I prepare a card size 3x8Inch and glue it on the back. At last I use another die cut from my stuff (Moda Scrap fustella flags)


I hope you like my card. 

Crafty Hugs Ute