Heute startet die neue Challenge bei bastel-traum.blogspot.ch
Today starts a new Challenge by bastel-traum.blogspot.ch
Dieses Mal geht es rund um das Thema Hintergrund. Schaue bei uns auf dem Blog vorbei und lasse Dich inspirieren. Jedes DT Mitglied hat sich etwas besonderes einfallen lassen.
This time is the theme background. Please feel free to visit our challenge blog to show what the talented DT made for wonderful inspiration for you.
Kennst Du die wunderbare Welt der Alkohol Inks? Wieso nicht einmal diese als Hintergrund nutzen? Jede Karte ist ein Unikat. Es ist unmöglich, dass man den Hintergrund nochmals so hinbekommt, es kommt immer etwas Neues heraus.
Do you know the wonderful world of Alcohol Inks? Why don't use it as background? Every card is unique. It isn't possible to create the same background again. Every time I use the inks, they become a new pattern, also I use the exact the same one ;)
Karte | card #1
Ich benutze das Stempelset Peach and Piper Checking the Post von Picket Fence für beide Karten.. Ich finde dies sehr niedlich und habe mit verliebt, als ich es zum ersten Mal gesehen habe.
I use for both cards the same stamp set from Picket fence, called Peach and Piper Checking the Post. I fall in love, as I saw this stamp set the first time, because it is sooo super cute.
Karte | card #2
Auch hier benutze ich das selbe Stempelset, wie bei der ersten Karte, habe mich aber für ein anderes Motiv entschieden.
Here I use the same stamp set like before, but I used another image.
Wie werden diese Hintergründe gemacht?
How I made this backgrounds?
Ich bevorzuge Yupo Papier vom Blog, (Legion). Dieses lässt den Alkohol besser vermischen und macht zudem einen Effekt auf dem Papier, welches ich nicht hinbekomme, wenn ich Yupo von Ranger nehme.
Wieso dies nicht klappt weiss ich nicht, aber wenn sich da jemand auskennt, dann bin ich sehr froh, um Tipps. Ich schütte verschiedene Alkohol Inks auf das Papier und arbeite hier auch mit Alcohol Blending Solution, weil diese den Alkohol git mischt. Ich puste und bewege das Papier, aber Achtung, die Hände können dabei schmutzig werden :) Sobald es trocken ist, nutze ich eine kleine Sprayflasche mit Isopropanol. Hier sollte man aber darauf achten, dies nicht in geschlossenen Räumen durchzuführen. Ich warte bis trocken, wiederhole, dies immer wieder, bis mir der Hintergrund gefällt.
I prefer Yuopo paper from Legion. On this paper you can better mix and it make an effect, if you spray on this. It isn't possible on the Yupo paper from Ranger. Why it din't work the same, I don't know, maybe you know it and want to tell me, what I can make, that it works also, please feel free in the comments below. I use one sheet of paper 5x7 Inch, so you can share this and use for two cards.
I use Alcohol Inks, colors I like. Here I use green tone, Alcohol Blending Solution for mix the inks. Now I blow the inks away and move the paper. Be careful, it is possible to add the ink on your hands ;)
If I like it, I let it dry. After drying I add spray (Isopropanol) on the Yupo paper. Cave: open the window or go outside to spray, because it isn't healthy to use this into the room. I let the dry again and repeat the steps, till the paper looks like I want.
Diesen Tipp bekam ich von meiner Freundin Sandra Petersen. DANKE vielmals. Auf den Link findest Du ihr Instagram Profile. Dort zeigt sie wunderbare, inspirierende und geniale Karten. Lass Dich inspirieren.
I get this Tipp from my friend Sandra Petersen. THANKS so much. On the link below, you will find her IG profile. There are lots of amazing, stunning and lovely cards. Let you inspire.
Produkte, welche ich genutzt habe:
I am used follow Products:
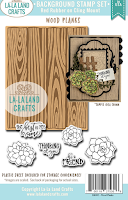
Leave Die cuts from LaLaLand


