Welcome to my blog. It is time for a new inspiration.
When it comes to designing cards, there are many ways to make them creative and unique. One cute idea is to use bear, beehive and bees as a motif on the card.
The combination of these three elements is not only pretty to look at, but also symbolic. The bear stands for strength and ferocity, the bees for diligence and cooperation and the honey for sweetness and pleasure. A card with this motif is perfect for various occasions such as birthdays, invitations or as a thank you card.
Herzlich willkommen auf meinen Blog. Es ist Zeit für eine neue Inspiration.
Wenn es um die Gestaltung von Karten geht, gibt es viele Möglichkeiten, um diese kreativ und einzigartig zu gestalten. Eine süße Idee ist die Verwendung von Bär, Bienenstock und Bienen als Motiv auf der Karte.
When it comes to designing cards, there are many ways to make them creative and unique. One cute idea is to use bear, beehive and bees as a motif on the card.
The combination of these three elements is not only pretty to look at, but also symbolic. The bear stands for strength and ferocity, the bees for diligence and cooperation and the honey for sweetness and pleasure. A card with this motif is perfect for various occasions such as birthdays, invitations or as a thank you card.
Herzlich willkommen auf meinen Blog. Es ist Zeit für eine neue Inspiration.
Wenn es um die Gestaltung von Karten geht, gibt es viele Möglichkeiten, um diese kreativ und einzigartig zu gestalten. Eine süße Idee ist die Verwendung von Bär, Bienenstock und Bienen als Motiv auf der Karte.
Die Kombination dieser drei Elemente ist nicht nur hübsch anzusehen, sondern auch symbolträchtig. Der Bär steht für Kraft und Wildheit, die Bienen für Fleiß und Zusammenarbeit und der Honig für Süße und Genuss. Eine Karte mit diesem Motiv eignet sich perfekt für verschiedene Anlässe wie Geburtstage, Einladungen oder als Dankeskarte.

How I made this card?
To create such a card, you need only a few materials. First of all, you need paper or cardboard of the desired color and size. Then, with the help of stamps or stencils, you can stamp bears, bees and the hive (by which is honey) on the paper.
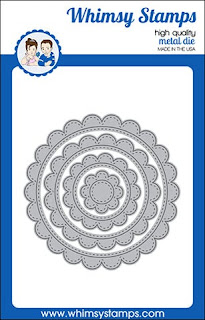
I decided to use an A2 card. In addition, I have worked with die cuts. The products can be found as always at the end of the blog.
I worked directly on the background with the honeycomb stencil. Then I applied the pattern to the circle, which I applied to the card with a wavy circle before gluing on the designs. I rounded off the card with a matching saying.
Wie habe ich diese Karte gemacht?
Um eine solche Karte zu gestalten, benötigt man nur wenige Materialien. Zunächst einmal braucht man Papier oder Karton in der gewünschten Farbe und Größe. Dann kann man mit Hilfe von Stempeln oder Schablonen Bären, Bienen und den Bienenstock (indem Honig ist) auf das Papier stempeln.
Ich habe mich für eine A2Karte entschieden. Zusätzlich habe ich mit Stanzen gearbeitet. Die Produkte findest Du wie immer am Ende des Blogs.
Ich habe mich für eine A2Karte entschieden. Zusätzlich habe ich mit Stanzen gearbeitet. Die Produkte findest Du wie immer am Ende des Blogs.
Ich habe direkt auf dem Hintergrund mit der Wabenschablone gearbeitet. Dann habe ich das Muster auf den Kreis aufgebracht, welchen ich mit einem gewellten Kreis auf der Karte aufgebracht, bevor ich die Motive aufgeklebt habe. Abgerundet habe ich die Karte mit einen passenden Spruch.
Products | Produkte
I link here all products, which I have used.
Ich verlinke hier alle Produkte, welche ich gebraucht habe.
Ich verlinke hier alle Produkte, welche ich gebraucht habe.


In any case, the combination of bear, honey and bees is a cute idea for card design. It is easy to implement, looks pretty and has a special symbolism that is suitable for many occasions. Just give it a try and let your creativity run wild! Thanks for visit my blog and for your lovely comment.
In jedem Fall ist die Kombination von Bär, Honig und Bienen eine süße Idee für die Gestaltung von Karten. Sie ist einfach umzusetzen, sieht hübsch aus und hat eine besondere Symbolik, die sich für viele Anlässe eignet. Probieren Sie es einfach mal aus und lassen Sie Ihrer Kreativität freien Lauf!Danke vielmals, dass Du mich auf dem Blog besucht hast und für Deinen lieben Kommentar.