
Welcome to my blog. It is time for a new inspiration.
Herzlich willkommen auf meinen Blog. Es ist Zeit für eine neue Inspiration.

How I made this card?
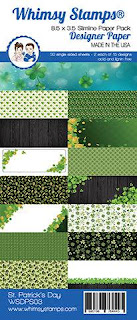
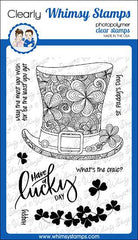
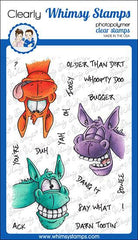
As I promised before, I'll show you a card where the hat was scaled down. For this you need shrink plastic. For this you need shrink plastic wrap. It's not so easy to stamp on it and color that out, the first hat I smeared and that ended up in the trash. It works best if you roughen the shrink wrap a little. Now stamp the whole thing with Stazon, then wait a little until it dries. Now you can color this. Here you have to remember that the colors become more intense when you shrink. Pencils are best suited. After you have colored, you cut out the hat. I have left a small edge, but after that you almost do not see. Now you stamp the donkeys and color them, then you also cut out the donkeys. I have thought that these should look best through the fim strip. In the paper package St. Patricks I came across the beautiful black wood paper, which I find really beautiful and it fits perfectly. My card should also show something golden, so I embellished the long edges with a golden tape, alternatively glitter paper also goes. Now the wood paper over it, the film strip and the donkeys arrange, as one likes. When you are satisfied, stick it down. The teeth of the donkeys I have highlighted with Glossy still something. To put the hat on, you have to clip the donkey's ear. Finally, add a sentiment and some rhinestones and the card is done.
Wie habe ich diese Karte gemacht?
Wie ich es schon versprochen habe, zeige ich Euch eine Karte, wo der Hut verkleinert wurde. Dafür braucht man Schrumpffolie. Es ist nicht ganz einfach darauf zu stempeln und das auszumalen, den ersten Hut habe ich verschmiert und der ist im Abfall gelandet. Am besten funktioniert es, wenn man die Schrumoffolie ein wenig anraut. Nun stempelt man das Ganze mit Stazon, dann wartet man ein wenig, bis es angetrocknet ist. Nun kann man dies ausmalen. Dabei muss man daran denken, dass die Farben intensiver werden, wenn man schrumpft. Am besten eignen sich Buntstifte. Nachdem man ausgemalt hat, schneidet man den Hut aus. Ich habe einen kleinen Rand gelassen, den man aber danach fast nicht mehr sieht. Nun stempelt man die Esel und coloriert diese, danach schneidet man auch die Esel aus. Ich habe gedacht, dass diese am Besten durch den Fimstreifen schauen sollten. Im Papierpaket St. Patricks bin ich auf das wunderschöne schwarze Holzpapier gestossen, was ich wirklich sehr schön finde und es passt perfekt. Meine Karte sollte auch etwas goldiges zeigen, deshalb habe ich die langen Ränder mit einem goldigen Tape verschönert, alternativ geht auch Glitzerpapier. Nun das Holzpapier darüber, den Filmstreifen und die Esel arrangieren, wie es einem gefällt. Wenn man zufrieden ist, klebe es fest. Die Zähne der Esel habe ich mit Glossy noch etwas hervorgehoben. Um den Hut aufzusetzen, muss man den Esel das Ohr kürzen. Zum Schluss noch ein Sentiment und ein paar Strasssteine und fertig ist die Karte.
Products | Produkte
I link here all products, which I have used.
Ich verlinke hier alle Produkte, welche ich gebraucht habe.
Ich verlinke hier alle Produkte, welche ich gebraucht habe.

Thanks for visit my blog and for your lovely comment.
Danke vielmals, dass Du mich auf dem Blog besucht hast und für Deinen lieben Kommentar.


