Posts mit dem Label Enjoy the little things werden angezeigt. Alle Posts anzeigen

Samstag, 22. Juli 2023

Whimsy Stamps | New Release 20. July | Retro Vibes Paper Happy Birthday

  Welcome to my blog.  Today is New Release day and I show you what I have designed with the new products. 

Herzlich willkommen auf meinen Blog. Heute ist New Release Tag und ich zeige Dir was ich mit den neuen Produkten gestaltet habe. 


Products | Produkte

I link here all products, which I have used.
Ich verlinke hier alle Produkte, welche ich gebraucht habe.



Freitag, 21. Juli 2023

Whimsy Stamps | New Release 20. July | Retro Vibes Paper Little Moments


  Welcome to my blog.  Today is New Release day and I show you what I have designed with the new products. 

Herzlich willkommen auf meinen Blog. Heute ist New Release Tag und ich zeige Dir was ich mit den neuen Produkten gestaltet habe. 


Products | Produkte

I link here all products, which I have used.
Ich verlinke hier alle Produkte, welche ich gebraucht habe.


Montag, 6. Februar 2023

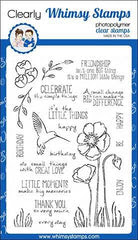
Whimsy Stamps | Enjoy the Little Things

 Welcome to my blog.  It is time for a new inspiration.
Herzlich willkommen auf meinen Blog. Es ist Zeit für eine neue Inspiration.


How I made this card?

This time I stamped and masked the hummingbird and flower first. After that I stamped the font in the background. When I was happy with the result, I removed the masking and colored the flower and the hummingbird. Now still on the card arranged so that I like it and ready.

Wie habe ich diese Karte gemacht?

Dieses Mal habe ich den Kolibri und die Blume zuerst gestempelt und maskiert. Danach habe ich die Schrift im Hintergrund gestempelt. Als ich mit dem Ergebnis zufrieden war, habe ich das Masking entfernt und die Blume und den Kolibri coloriert. Nun noch auf der Karte so angeordnet, dass es mir gefällt und fertig.

Products | Produkte

I link here all products, which I have used.
Ich verlinke hier alle Produkte, welche ich gebraucht habe.


Thanks for visit my blog and for your lovely comment. 
Danke vielmals, dass Du mich auf dem Blog besucht hast und für Deinen lieben Kommentar. 


Montag, 16. Januar 2023

Whimsy Stamps | Thank You

 Welcome to my blog.  It is time for a new inspiration. Sometimes what you need is a quick and easy card. This one is a more elaborate, but still made quickly. 
Herzlich willkommen auf meinen Blog. Es ist Zeit für eine neue Inspiration. Manchmal braucht es eine schnelle und einfache Karte. Diese ist zwar ein aufwendiger, aber trotzdem schnell gemacht. 


Products | Produkte

I link here all products, which I have used.
Ich verlinke hier alle Produkte, welche ich gebraucht habe.


Thanks for visit my blog and for your lovely comment. 
Danke vielmals, dass Du mich auf dem Blog besucht hast und für Deinen lieben Kommentar. 


Sonntag, 3. Juli 2022

Whimsy Stamps | It's the little things


Welcome to my blog.  It is time for a new inspiration.
Herzlich willkommen auf meinen Blog. Es ist Zeit für eine neue Inspiration.


How I made this card?

For this card, I made myself a stencil using a die cut. First I cut a piece of paper in the same size as my card is, then die cut and now fit to my card. I work on a magnetic plate, which is super easy to hold the papers, I do not need tape :) I now made a background with the Ocean Stencil, which is very easy with the Distress Oxide (Mermaid Lagoon, Salty Ocean, Blueprint Sketch). With the Rays Stencil I added some sun rays with Tumbled Glass Distress Oxide Ink. After I liked the background, I added some more details with black, like coral/seagrass, fishes and a turtle. Now I could remove my paper stencil again and add a sentiment. Now the card looked a little empty, so I looked for something hearty and found the cute turtle. With a very bright ink I stamped this to implement the No Line technique. I work with Copics. 

Color recipe for the turtle:
Eyes: BG000 | Blender | Fineliner
Green: G85 | G24 | G43 | YG11
Brown: E44 | E43 | E42 | E41
Shadow: Luminace 639
white acrylic pencil

Now I cut out the turtle and attached it to the card with spacer glue. Finally I glued a few bubbles on the card.

Wie habe ich diese Karte gemacht?

Bei dieser Karte habe ich mir mittels einer Stanze einen Stencil gebastelt. Zuerst habe ich mir ein Stück Papier in der selben Grösse zugeschnitten, wie meine Karte ist, dann ausgestanzt und nun an meine Karte angepasst. Ich arbeite auf einer Magnetplatte, was super einfach ist, die Papiere festzuhalten, da brauche ich kein Klebeband :) Mit dem Ocean Stencil habe ich nun einen Hintergrund gebastelt, was mit den Distress Oxide sehr einfach ist (Mermaid Lagoon, Salty Ocean, Blueprint Sketch). Mit dem Rays Stencil habe ich noch ein paar Sonnenstrahlen mit Tumbled Glass Distress Oxide Ink eingefügt. Nachdem mir der Hintergrund gefällt, habe ich mit Schwarz noch ein paar Details, wie Korallen/ Seegrass, Fische und eine Schildkröte eingefügt. Nun konnte ich meinen Papier  Stencil wieder entfernen und ein Sentiment anbringen. Nun wirkte die Karte ein wenig leer, also noch etwas herziges gesucht und die niedliche Schildkröte gefunden. Mit einem sehr hellen Ink habe ich diese gestempelt, um die No Line Technik umzusetzen. Ich arbeite mit Copics. 

Farbrezept für die Schildkröte:
Augen: BG000 | Blender | Fineliner
Grün: G85 | G24 | G43 | YG11
Braun: E44 | E43 | E42 | E41
Schatten: Luminace 639
wiessen Acrylstift

Nun habe ich die Schildkröte ausgeschnitten und mit Abstandklebern auf der Karte angebracht. Zum Schluss habe ich noch ein bar Blasen auf der Karte aufgeklebt.


Products | Produkte

I link here all products, which I have used.
Ich verlinke hier alle Produkte, welche ich gebraucht habe.


Thanks for visit my blog and for your lovely comment. 
Danke vielmals, dass Du mich auf dem Blog besucht hast und für Deinen lieben Kommentar. 


Donnerstag, 26. Mai 2022

Whimsy Stamps | A small change can make a big difference


Welcome to my blog.  It is time for a new inspiration.
When you use a die cut, the background is blank. This scene was also blank, then I thought about what I wanted to show you and started coloring this, adding details, putting myself in this fairytale scene.... and then this came into being.
Herzlich willkommen auf meinen Blog. Es ist Zeit für eine neue Inspiration.
Wenn man eine Stanze benutzt, ist der Hintergrund leer. Auch diese Szene war leer, dann habe ich mir überlegt, was ich Euch zeigen möchte und habe angefangen dies auszumalen, Details hinzuzufügen, mich in diese märchenhafte Szene versetzt... und dann ist dies entstanden.


How I made this card?

The blank die-cut scene shows me details like the windmill, trees, a water wheel, but also the windows, door, or a path. Before I started coloring them, I fixed the path, the windows and the door to the scene with a tape. 
I have first painted the house, it should be a stone look and a thatched roof, the windows I have outlined, so I want to show a frame. After the house I painted the stones, the path, stones on the edge of the water wheel, as well as this and the landscape opposite the wheel. Then I have indicated and expanded the fence, painted the meadow and the trees and finally I painted the water. At the end I brought shadows into the picture, as well as details, such as flowers, grasses... 
I thought it would be cool if the landscape had on a distance on the card. Here I have the scene again die cut on double sided, adhesive foam. It wasn't easy to get the scene on there and part of it you can see the foam a little bit. I think it was the hardest part of the card to glue this on correctly. The sky I cut out of the patterned paper. The rest of the paper I used as the background of the card, you can see so the missing rectangle no longer. Above I die cut out a white paper with distance and attached, then the sky, to the scene and another matching sentiment and the card is ready. 
No, actually I still used a bit of glossy, on the windows, as well as the water, to add a bit of shine.

Wie habe ich diese Karte gemacht?

Die leere ausgestanzte Szene zeigt mir Details, wie die Windmühle, Bäume, ein Wasserrad, aber auch die Fenster, Türe, oder einen Weg. Bevor ich angefangen habe diese zu Kolorieren, habe ich den Weg, die Fenster und die Türe mit einem Klebestreifen an der Szene fixiert. 
Ich habe zuerst das Haus ausgemalt, es sollte eine Steinoptik werden und ein Strohdach, die Fenster habe ich umrandet, damit will ich einen Rahmen zeigen. Nach dem Haus habe ich die Steine gemalt, den Weg, Steine am Rand des Wasserades, sowie dieses und die Landschaft gegenüber des Rades. Danach habe ich den Zaun angedeutet und erweitert, die Wiese und die Bäume gemalt und zum Schluss habe ich das Wasser gemalt. Am Schluss habe ich Schatten in das Bild gebracht, wie auch Details, wie Blumen, Grässer... 
Ich habe gedacht, es wäre cool, wenn die Landschaft auf einen Abstand auf der Karte hätte. Hier habe ich die Szene nochmals ausgestanzt auf doppelseitig, klebenden Schaumstoff. Es war nicht ganz einfach die Szene darauf zu bringen und zum Teil sieht man den Schaumstoff ein wenig. Ich glaube es war das schwierigste an der Karte dies korrekt aufzukleben. Den Himmel habe ich ausgeschnitten aus dem gemusterten Papier. Den Rest des Papiers habe ich als Hintergrund der Karte verwendet, man sieht ja so das fehlende Rechteck nicht mehr. Darüber habe ich mit Abstand ein weisses Papier ausgestanzt und befestigt, dann der Himmel, die Szene und noch ein passendes Sentiment und fertig ist die Karte. 
Nein, eigentlich habe ich noch ein bisschen Glossy verwendet, auf den Fenstern, sowie dem Wasser, um noch ein bisschen Schein hinzuzufügen.

Products | Produkte

I link here all products, which I have used.
Ich verlinke hier alle Produkte, welche ich gebraucht habe.