Posts mit dem Label Confetti werden angezeigt. Alle Posts anzeigen

Dienstag, 26. Juli 2022

Whimsy Stamps | Thank you ever so much


Welcome to my blog.  It is time for a new inspiration.
Herzlich willkommen auf meinen Blog. Es ist Zeit für eine neue Inspiration.


How I made this card?

An hourglass as a die cut is something quite extraordinary and I have long thought about what kind of content this should have. Only sand, I do not know, this seemed a little boring.... A few attempts later I decided to create a cheerful card with flowers and butterflies. Is not typical, but I think as an artist sometimes you have a different eye. Anyway, I hope you like this idea. Feel free to write me in the comments what you think should still be crafted with this die cut, maybe I'll take your idea and share your name.... Well, desire? I look forward to your response.

Wie habe ich diese Karte gemacht?

Eine Sanduhr als Stanze ist etwas ganz aussergewöhnliches und ich habe lange überlegt, was für einen Inhalt diese haben sollte. Nur Sand, ich weiss, nicht, dies wirkte ein wenig langweilig... Ein paar Versuche später habe ich mich entschieden doch eine fröhliche Karte zu gestalten mit Blumen und Schmetterlingen. Ist zwar nicht typisch, aber ich denke, als Künstler hat man manchmal auch ein anderes Auge. Ich jedenfalls hoffe, dass Euch die Idee gefällt. Gerne könnt ihr mir in die Kommentare schreiben, was Eurer Meinung nach noch mit dieser Stanze gewerkelt werden sollte, vielleicht übernehme ich dann Eure Idee und teile Euren Namen... Na, Lust? Freu mich auf Eure Antwort.

Products | Produkte

I link here all products, which I have used.
Ich verlinke hier alle Produkte, welche ich gebraucht habe.


Thanks for visit my blog and for your lovely comment. 
Danke vielmals, dass Du mich auf dem Blog besucht hast und für Deinen lieben Kommentar. 


Montag, 23. Mai 2022

Whimsy Stamps | Special Friendship


Welcome to my blog.  It is time for a new inspiration.
Herzlich willkommen auf meinen Blog. Es ist Zeit für eine neue Inspiration.


How I made this card?

First I stamped the cute dogs, this time I used a very light stamp ink because I don't want to see the lines when I'm done coloring. This technique is called no line technique. After I was done with, I used the die cut to cut out the dogs.
A base card in white, seemed kind of boring, so I decided to brighten it up a bit. First I decided what sentiment could go with this and stamped this off. Then I masked this and took my stencil and smeared a light and a dark blue over it (Distress Oxide Ink). A few more splashes and the background is ready. 
Lastly, I decided that a strip of patterned paper and some confetti would enhance the card. 

Wie habe ich diese Karte gemacht?

Zuerst habe ich die süssen Hunde gestempelt, dieses Mal habe ich eine sehr helle Stempelfarbe genutzt, da ich die Linien nicht sehen möchte, wenn ich fertig mit Kolorieren bin. Diese Technik nennt sich no line Technik. Nachdem ich mit fertig war, habe ich die Stanze benutzt, um die Hunde auszustanzen.
Eine Basiskarte in weiss, wirkte irgendwie langweilig, deshalb entschied ich diese ein wenig aufzupeppen. Zuerst habe ich mich entschieden, welches Sentiment dazu passen könnte und stempelte dies ab. Danach maskierte ich dies und nahm meinen Stencil und schmierte ein helles und ein dunkles blau darüber (Distress Oxide Ink). noch ein paar Spritzer und fertig ist der Hintergrund. 
Zuletzt entschied ich, dass ein Streifen gemustertes Papier und ein paar Confetti die Karte aufwerten. 

Products | Produkte

I link here all products, which I have used.
Ich verlinke hier alle Produkte, welche ich gebraucht habe.


Montag, 16. Mai 2022

Whimsy Stamps | Happy Birthday Denise

 Welcome to my blog.  It is time for a new inspiration.
It’s Denise Lynn’s birthday, the owner of Whimsy Stamps, and we want to celebrate. Come hop with us as our designers share birthday cards for Denise. One lucky winner will win a $100 gift certificate to Whimsy Stamps and a second winner will win a $50 gift certificate to This Calls for Confetti..  Hop to Instagram will be on Instagram
Herzlich willkommen auf meinen Blog. Es ist Zeit für eine neue Inspiration.
Denise Lynn, die Inhaberin von Whimsy Stamps, hat Geburtstag, und das wollen wir feiern. Kommen spiel mit, wenn wir unsere Designer Geburtstagskarten für Denise teilen. Ein glücklicher Gewinner gewinnt einen 100-Dollar-Gutschein für Whimsy Stamps und ein zweiter Gewinner einen 50-Dollar-Gutschein für This Calls for Confetti. Der Hop findet auf Instagram statt.


How I made this card?

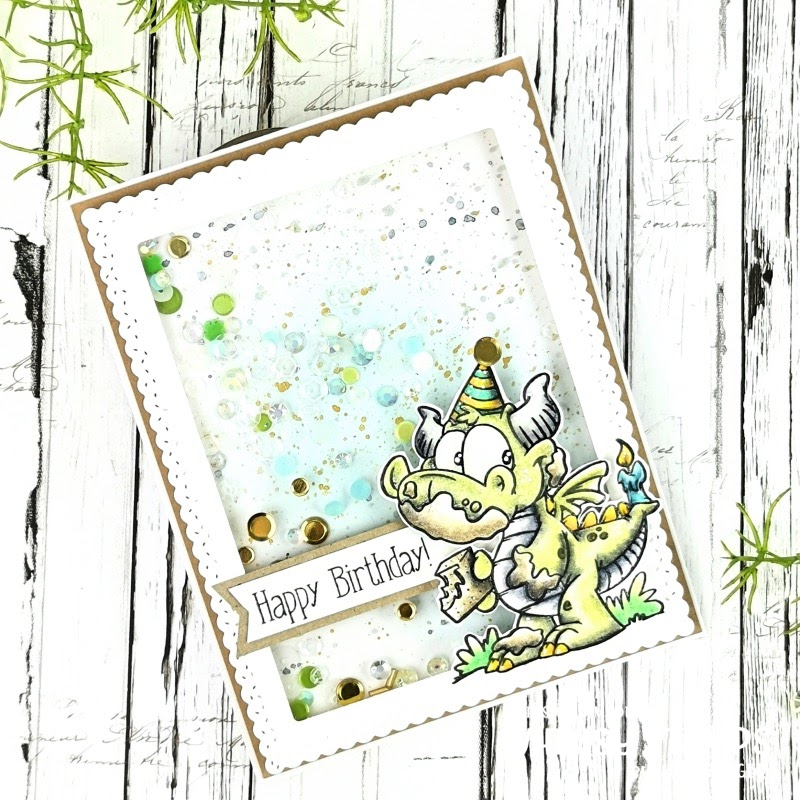
First I made a frame so I could then attach the foil so the confetti wouldn't fall out. Then I made a background and spiced it up a bit. Now the double-sided adhesive foam strip, confettis purely and cover (my background paper) on it. My shaker element is ready. Now quickly finish the rest of the card. For this I took a white card as a base, under the shaker element kraft paper, then also a piece in the inside, on top of a white card stock. Now I stamped the motif, colored and glued to a short sentiment on the front, with a little spacer glue. In the inside I still stamped a saying from the stamp set and the card is ready.


Wie habe ich diese Karte gemacht?

Zuerst habe ich einen Rahmen gemacht, damit ich dann die Folie anbringen konnte, damit die Konfettis nicht herausfallen. Dann habe ich einen Hintergrund gewerkelt und ein wenig aufgepeppt. Nun den doppelseitig klebenden Schaumstoffstreifen, Konfettis rein und Deckel (mein Hintergrundpapier) drauf. Mein Shaker Element ist fertig. Nun noch schnell den Rest der Karte fertig werkeln. Dafür habe ich eine weisse Karte als Basis genommen, unter das Shaker Element Kraftpapier, dann auch noch ein Stück in die Innenseite, darauf ein weissen Card stock. Nun habe ich das Motiv abgestempelt, ausgemalt und zu einem kurzen Sentiment auf die Vorderseite geklebt, mit ein wenig Abstandsklebern. In die Innenseite habe ich noch einen Spruch vom Stempelset gestempelt und fertig ist die Karte.


Products | Produkte

I link here all products, which I have used.
Ich verlinke hier alle Produkte, welche ich gebraucht habe.


Dienstag, 3. Mai 2022

Whimsy Stamps | You are loved

 Welcome to my blog.  It is time for a new inspiration.
Herzlich willkommen auf meinen Blog. Es ist Zeit für eine neue Inspiration.


How I made this card?

I decided that I would take several stamps from the set to make this card. But how to show? I thought that the Selfie Set fits very well, since I have a few Polaroid photo's here, which would fit well with the theme. So I die cut these and then stamped the inside. This I have colored with my Luminance colored pencils. I distressed the corners of the photo a bit.
After I had done this, I thought about how I position these photos best on the card. I decided on a 6x6 inch card, which I already have in my inventory. Now I splashed gold and some black paint on the background of this card, but only in the upper right and lower left corners. 

Now I die cut and prepared a slimline tag by distressing the corners slightly. Another strip of patterned paper. This I placed on the card and when I was happy with the position, I glued this in place. 

The sentiment you're going to be amazing parents, comes from the stamp set, but somehow the card still looked a little empty. So again I thought about what I wanted and I decided that I would use the Loved punch and add to it write, you are, which I could stamp myself with an ABC stamp. 

Still a few flowers, and a few stars from a Confetti Mix, and the card is ready.


Wie habe ich diese Karte gemacht?

Ich habe mich entschieden, dass ich mehrere Stempel aus dem Set nehme, um diese Karte zu werkeln. Doch wie zeigen? Ich dachte, dass das Selfie Set sehr gut passt, da ich hier ein paar Polaroid Foto's habe, welche gut zum Thema passen würden. Also habe ich diese ausgestanzt und danach das innere bestempelt. Dies habe ich ausgemalt mit meinen Luminance Farbstiften. Die Ecken des Fotos habe ich ein wenig distressed.
Nachdem ich dies getan hatte, habe ich mir überlegt, wie ich diese Fotos am Besten auf der Karte positioniere. Ich habe mich für eine 6x6 Inch Karte entschieden, welche ich bereits im meinem Inventar habe. Nun habe ich diese im Hintergrund bespritzt mit Gold und etwas Schwarzer Farbe, dies allerdings nur in der rechten oberen und linken unteren Ecke. 

Nun habe ich einen Slimline Tag ausgestanzt und vorbereitet, indem ich die Ecken leicht distressed habe. Noch ein Streifen gemustertes Papier. Dies habe ich auf die Karte gelegt und als ich mit der Position einverstanden war, habe ich dies fest geklebt. 

Das Sentiment you're going to be amazing parents, kommt vom Stempelset, aber irgendwie wirkte die Karte noch ein wenig leer. Also nochmals überlegt, was ich möchte und ich entschied mich, dass ich die Loved Stanze benutze und dazu noch schreibe, you are, welches ich mit einem ABC Stempel selbst stempeln konnte. 

Noch ein paar Blumen, und ein paar Sterne aus einem Confetti Mix, und fertig ist die Karte.


Products | Produkte

I link here all products, which I have used.
Ich verlinke hier alle Produkte, welche ich gebraucht habe.