Sonntag, 26. Juni 2022

Whimsy Stamps | Hey There!


Welcome to my blog.  It is time for a new inspiration.
Herzlich willkommen auf meinen Blog. Es ist Zeit für eine neue Inspiration.


How I made this card?

This time I followed a tutorial that enabled me to paint a background. This little squirrel with his acorn, his treasure, fits beautifully in a forest. So stamp and get started. Finally, I punched out the scene and glued it to a white slimline card, plus a matching sentiment. 

Wie habe ich diese Karte gemacht?

Dieses Mal habe ich ein Tutorial befolgt, welches mich befähigt einen Hintergrund zu malen. Dieses kleine Eichhörnchen mit seiner Eichel, seinem Schatz, passt wunderbar in einen Wald. Also stempeln und loslegen. Zum Schluss habe ich die Szene ausgestanzt und auf eine weisse Slimline Karte geklebt, dazu noch ein passendes Sentiment. 

Products | Produkte

I link here all products, which I have used.
Ich verlinke hier alle Produkte, welche ich gebraucht habe.


Thanks for visit my blog and for your lovely comment. 
Danke vielmals, dass Du mich auf dem Blog besucht hast und für Deinen lieben Kommentar. 


Donnerstag, 23. Juni 2022

Whimsy Stamps | Enjoy the Moment


Welcome to my blog.  It is time for a new inspiration.
Herzlich willkommen auf meinen Blog. Es ist Zeit für eine neue Inspiration.


How I made this card?

This card is very special, here I used 3 D paper technique, but I did without the spacer glue. How does it work? You stamp the image several times, then decide what is in the foreground or background. Now you work from the background to the foreground and color in the things that are in the background first. Then you cut out the motif and continue working, if I have a motif, painted, then I no longer need it afterwards and cut it off. This is how layers/dimensions are created. 
For the card in the background I used the stencil to create a pattern. Then glued the flamingo and stamped a sentiment to it and still a few insects.

Wie habe ich diese Karte gemacht?

Diese Karte ist ganz speziell, hier habe ich 3 D Papiertechnik angewandt, aber ich habe auf die Abstandskleber verzichtet. Wie geht das? Man stempelt das Bild mehrfach ab, entscheidet dann, was im Vordergrund oder im Hintergrund ist. Nun arbeitet man vom Hintergrund in den Vordergrund und malt zuerst die Sachen aus, welche im Hintergrund sind. Dann schneidet man das Motiv aus und arbeitet weiter, wenn ich ein Motiv, gemalt habe, dann brauche ich es danach nicht mehr und schneide es ab. So entstehen Schichten/ Dimensionen. 
Für die Karte im Hintergrund habe ich den Stencil genutzt, um ein Muster zu gestalten. Dann den Flammingo aufgeklebt und ein Sentiment dazu gestempelt und noch ein paar Insekten.

Products | Produkte

I link here all products, which I have used.
Ich verlinke hier alle Produkte, welche ich gebraucht habe.


Thanks for visit my blog and for your lovely comment. 
Danke vielmals, dass Du mich auf dem Blog besucht hast und für Deinen lieben Kommentar. 


Donnerstag, 16. Juni 2022

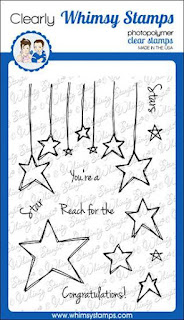
Whimsy Stamps | Reach for the Stars


Welcome to my blog.  It is time for a new inspiration.
Herzlich willkommen auf meinen Blog. Es ist Zeit für eine neue Inspiration.


How I made this card?

Oh, how cute is the little lion.... to fall in love, so I thought I would like to show this together with the star stamps. The idea came to me when I held the patterned paper in my hands. 
Why not a night scene? On my A2 (US size) card I stuck the paper in the background after I cut a this fishtail style :) Now I put the lion on it and thought about what could be the next step. I decided to make a frame, put the lion in there. Then I put this on my card, put the grass stamp over it, removed the lion and stamped the grass. Now I have a background that matches. Now add the sentiment on top of the frame.  Then attached this with spacer glue on the card. Finally, I stamped a few stars on golden paper and cut out, then glued on, since this seemed a little boring, I took even smaller stars from the confetti.

Wie habe ich diese Karte gemacht?

Oh, wie niedlich ist der kleine Löwe... zum Verlieben, so dachte ich, dass ich diesen zeigen möchte zusammen mit den Sternenstempel. Die Idee kam mir, als ich das gemusterte Papier in den Händen hielt. Warum nicht eine Nachtszene? Auf meinem A2 (US Format) Karte klebte ich das Papier im Hintergrund, nachdem ich einen dies Fischschwanz mässig zugeschnitten habe :) Nun setzte ich den Löwen darauf und überlegte, was der nächste Schritt sein könnte. Ich habe mich entschieden, einen Rahmen zu machen, den Löwe da rein zu setzen. Danach legte ich diesen auf meine Karte, legte den Gras Stempel darüber, entfernte den Löwen und stempelte das Gras. Nun habe ich einen passenden Hintergrund. Nun noch den Spruch auf den Rahmen.  Danach diesen mit Abstandsklebern auf der Karte befestigt. Zum Schluss habe ich noch ein paar Sterne gestempelt auf goldenen Papier und ausgeschnitten, danach aufgeklebt, da dies ein wenig langweilig wirkte, habe ich noch kleinere Sterne von den Konfettis genommen.

Products | Produkte

I link here all products, which I have used.
Ich verlinke hier alle Produkte, welche ich gebraucht habe.


Thanks for visit my blog and for your lovely comment. 
Danke vielmals, dass Du mich auf dem Blog besucht hast und für Deinen lieben Kommentar. 


Mittwoch, 15. Juni 2022

#114 etwas mit Flügeln | things with wings

 Heute startet unsere neue Challenge bei bastel-traum.blogspot.com
Our new challenge starts today at bastel-traum.blogspot.com


Dieses Mal geht es rund um  das Thema etwas mit Flügeln. Was auch immer Dich jetzt gerade anspricht vom Motiv, ist frei wählbar, ob eine CAS Karte oder auch eine aufwendige Karte... alles ist erlaubt. Überrasche uns von Deiner Seite mit einer Idee. 

This time it's all about the theme things with wings. Whatever appeals to you right now from the motif, is freely selectable, whether a CAS card or even an elaborate card ... everything is allowed. Surprise us from your side with an idea. 


Hier ist meine Inspiration für Dich.
Here is my inspiration for you.


Lee Holland | You are my Sunshine
MFT | Black and White Stripes 


Lass Dich auch von den Designern auf unseren Blog überraschen, was sie tolles gezaubert haben. 
Let yourself be surprised by the designers on our blog, what they have created. 


Danke vielmals dass Du meinen Blog besucht hast und für Deinen lieben Kommentar. 
Thank you so much for visiting my blog and for your lovely comment. 


Ute

Montag, 13. Juni 2022

Whimsy Stamps | Kiss a Frog


Welcome to my blog.  It is time for a new inspiration.
Herzlich willkommen auf meinen Blog. Es ist Zeit für eine neue Inspiration.


How I made this card?

Today I show you a Shaker card. Do you already know the Tapered Frame die? This is perfect for a Shaker card. I first took a patterned paper and then die cut it, then I took the larger frame and attached a foil to it on the back, then foam tape (double sided) and filled confetti in before closing this with a white matching backing. Then I decorated the front. Finally, I made a matching card and stuck the shaker element on it. 

Wie habe ich diese Karte gemacht?

Heute zeige ich Euch eine Shaker Karte. Kennst Du schon die Stanze Tapered Frame? Diese ist perfekt für eine Shaker Karte. Ich habe zuerst ein gemustertes Papier genommen und dann ausgestanzt, dann habe ich den grösseren Rahmen genommen und eine Folie daran befestigt an der Rückseite, danach Schaumstoff Klebeband (doppelseitig) und Konfetti reingefüllt, bevor ich dies mit einer weissen passenden Rückseite geschlossen. Dann habe ich die Vorderseite dekoriert. Zum Schluss habe ich eine passende Karte gebastelt und das Shaker Element darauf geklebt. 

Products | Produkte

I link here all products, which I have used.
Ich verlinke hier alle Produkte, welche ich gebraucht habe.


Thanks for visit my blog and for your lovely comment. 
Danke vielmals, dass Du mich auf dem Blog besucht hast und für Deinen lieben Kommentar.