Posts mit dem Label Savior werden angezeigt. Alle Posts anzeigen

Dienstag, 27. Februar 2024

Whimsy Stamps | Glorious Paper


Welcome to my blog.  It is time for a new inspiration.
Herzlich willkommen auf meinen Blog. Es ist Zeit für eine neue Inspiration.


Products | Produkte

I link here all products, which I have used.
Ich verlinke hier alle Produkte, welche ich gebraucht habe.

· Glorious Paper

· Build a Basket (egg)

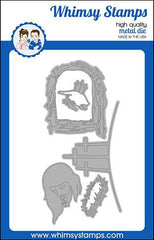
· Savior (crown | nest)

· Wild Weed 

· You are

· Whoopsie


Thanks for visit my blog and for your lovely comment. 
Danke vielmals, dass Du mich auf dem Blog besucht hast und für Deinen lieben Kommentar. 

Freitag, 3. März 2023

Whimsy Stamps | He is Risen

 Welcome to my blog.  It is time for a new inspiration.
Herzlich willkommen auf meinen Blog. Es ist Zeit für eine neue Inspiration.


How I made this card?

Dieses Mal  habe ich zuerst den Hintergrund mit den Stencil bearbeitet. Ich habe mich für dei Sonne in Safari Farben entschieden und noch ein paar Farbspritzer.Die Boho Kreise sind nicht ganz rund, wie ein Kreis, aber ich finde, dass gibt der Karte die richtige Note. Auf dem Boho Kreis habe ich eine Szene aus Afrika gemalt und dannach den Löwen ausgestanzt und bemalt. Als ich so ausmalte, kam mir in den Sinn, dass Jesus unser Löwe ist... und da bald Ostern ist, fiel mir das Sentiment vom letzten Jahr ein, wieso nicht eine christliche Karte gestalten. Gedacht, getan und ich muss sagen, es gefällt mir sehr gut. 


Wie habe ich diese Karte gemacht?

This time I first worked on the background with the stencil. I chose the sun in safari colors and a few splashes of color. The Boho circles are not quite round, like a circle, but I think that gives the card the right touch. On the Boho circle I painted a scene from Africa and then punched out the lion and painted. As I was coloring, it occurred to me that Jesus is our lion... and since Easter is coming up, I remembered the sentiment from last year, why not make a Christian card. Thought, done and I must say I like it very much. 

Products | Produkte

I link here all products, which I have used.
Ich verlinke hier alle Produkte, welche ich gebraucht habe.


Thanks for visit my blog and for your lovely comment. 
Danke vielmals, dass Du mich auf dem Blog besucht hast und für Deinen lieben Kommentar. 


Samstag, 16. April 2022

Whimsy Stamps | He is Risen

 Welcome to my blog.  It is time for a new inspiration.

Herzlich willkommen auf meinen Blog. Es ist Zeit für eine neue Inspiration.


How I made this card?

A card where you do not have to colorize... This is rather rare for me, but I like this card. I need a 3.75x 5.25 inch white cardstock. Then in the center I die cut out the gate from the Savior die, after taking out all the details I flipped the cardstock over and applied tape to the back. Now I die cut out the gate again on black cardstock. The parts I then used all around. Through the tape they hold well. Now I die cut out the crosses with silver glossy paper and also the black background (view from the gate). This I have also done with the patterned paper, so that you can then puzzle everything together well. Now the sentiment from the matching stamp set and then stick the whole thing on a black card (4x 5.5 inches) and the card is ready. 

Wie habe ich diese Karte gemacht?

Eine Karte, wo man nicht kolorieren muss... Dies gibt es bei mir eher selten, aber ich mag diese Karte. Ich brauche ein 3.75x 5.25 Inch grossen weissen Cardstock. Mittig habe ich dann das Tor von dem Savior Stanzen ausgestanzt, nachdem ich alle Details herausgenommen habe, habe ich den Cardstock umgedreht und auf der Rückseite Tape angebracht. Nun habe ich das Tor nochmals auf  schwarzen Cardstock ausgestanzt. die Teile habe ich dann ringsum eingesetzt. Durch das Klebeband halten diese gut. Nun habe ich die Kreuze mit silber glänzenden Papier ausgestanzt  und auch den schwarzen Hintergrund (Aussicht vom Tor). Dies habe ich auch mit dem gemusterten Papier gemacht, so dass man dann alles gut zusammen puzzeln kann. Nun noch das Sentiment vom passenden Stempel Set und dann das Ganze auf eine schwarze Karte (4x 5.5 Inch) aufkleben und fertig ist die Karte. 

Products | Produkte

I link here all products, which I have used.
Ich verlinke hier alle Produkte, welche ich gebraucht habe.


Thanks for visit my blog and for your lovely comment. 
Danke vielmals, dass Du mich auf dem Blog besucht hast und für Deinen lieben Kommentar. 

Samstag, 26. März 2022

Whimsy Stamps | Does Bunny need a Hug?


Welcome to my blog.  It is time for a new inspiration.
This is a comforting card, appropriate when you lose or have lost someone. When I made this, I did not know that I would soon need it myself. A friend said that God helped me and hugs me when I look at this card. 
Herzlich willkommen auf meinen Blog. Es ist Zeit für eine neue Inspiration.
Dies ist eine tröstende Karte, passend, wenn man jemand verliert oder verloren hat. Als ich diese gebastelt hatte, wusste ich nicht, dass ich diese bald selbst brauchen sollte. Eine Freundin sagte, dass Gott mir geholfen hat und mich umarmt, wenn ich diese Karte anschaue. 


How I made this card?

I decided to use a white card A2 US format. To the crosses fit these little bunnies perfectly. So I stamped them on a white paper, which has the same size as the cards base. Then I applied the cut and traced lightly with a pencil, but only where the bunnies ears are. These I did not want to cut off, otherwise it would have become a no ear bunny. Now I cut out there with my scissors and then I was able to adjust the cut and push it through my Big Shot. Then I masked the bunny with masking paper, as well as some of the crosses and smeared the background with Distress Oxide Ink (twisted citron, mowed lawn, rustic wilderness) to create a lawn. This is quick and looks good. I then colored in the bunnies and stamped on a sentiment. 
Now still find the matching sky, which goes very well and quickly with the sky paper from Whimsy. Since I have the crosses again punched out, puzzled and cut to size Now everything on the card base glued and ready is the card. 

Wie habe ich diese Karte gemacht?

Ich habe mich für eine weisse Karte A2 US Format entschieden. Zu den Kreuzen passen diese kleinen Hasen perfekt. So habe ich diese auf ein weisses Papier gestempelt, was die gleiche Grösse hat, wie die Karten Basis. Danach habe ich die Stanze angelegt und mit einem Bleistift leicht nachgezogen, aber nur dort, wo die Hasen Ohren sind. Diese wollte ich nicht abschneiden, sonst wäre es ein Kein Ohr Hase geworden. Nun habe ich da mit meiner Schere ausgeschnitten und dann konnte ich die Stanze anpassen und durch meine Big Shot schieben. Danach habe ich den Hasen maskiert mit Masking Papier, sowie einen Teil der Kreuze und den Hintergrund mit Distress Oxide Ink   (twisted citron, mowed lawn, rustic wilderness) verschmiert, damit ein Rasen entsteht. Dies geht schnell und sieht gut aus. Danach habe ich die Hasen ausgemalt und ein Sentiment aufgestempelt. 
Nun noch den passenden Himmel finden, was mit dem Himmel Papier von Whimsy sehr gut und schnell geht. Da habe ich die Kreuze nochmals ausgestanzt, gepuzzelt und zurechtgeschnitten Nun alles auf der Karten Basis aufgeklebt und fertig ist die Karte. 

Products | Produkte

I link here all products, which I have used.
Ich verlinke hier alle Produkte, welche ich gebraucht habe.


Thanks for visit my blog and for your lovely comment. 
Danke vielmals, dass Du mich auf dem Blog besucht hast und für Deinen lieben Kommentar. 


Sonntag, 13. März 2022

Whimsy Stamps | Alpha & Omega


Welcome to my blog.  It is time for a new inspiration.
This time I'll show you a card that came to me spontaneously when I saw the cut of the head. It was a challenge, but I accepted it. 
Herzlich willkommen auf meinen Blog. Es ist Zeit für eine neue Inspiration.
Dieses Mal zeige ich Euch eine Karte, welche mir spontan eingefallen ist, als ich die Stanze des Kopfes sah. Es war eine Herausforderung, aber ich habe sie angenommen. 


How I made this card?

First, I thought about how I wanted to design the card. Then I cut out the head (Savior Die Cut). This I have colored with my Triblender to make this colorful. Also I cut out a piece of white foam with the head die cut. On this I glued the colored die cuts. To get a little more 3D effect, I painted shadows in it. Not quite sure, I was with the small cutting part on the chin, is that now beard or simply a fold. I have it then just painted with the face paint, because I personally liked it better. After I finished the head, I thought again and decided to attach the crown. This I have die cut out with silver, mirror paper. So this stands out a little better. After that, I put the head first on the side and have engaged with the background. I picked an A2 US size card, well actually a piece of paper, sized 5.5x8.5inches and folded it at 4.25 inches. I smeared the edge of the card with Distress Oxide Ink Ground Expresso, since the color matches the head so nicely. I then took the outer die from the Quilted Rainbow Die and decided I would work on that before applying the head. I then stamped the word Jesus multiple times in the background, always using the 2 print except for the last word. After that I still splattered the color over the paper. With a black ink I have still stamped the meaning to it, so the phrase "Jesus is the Alpha and the Omega". Then I punched out a circle (Vellum) and put the head on it. Finally, I used a few rhinestones. 

Wie habe ich diese Karte gemacht?

Zuerst habe ich mir überlegt, wie ich die Karte designen möchte. Dann habe ich den Kopf ausgestanzt (Savior Die Cut). Diesen habe ich mit meinen Triblendern ausgemalt, um diesen bunt zu gestalten. Ebenfalls habe ich ein Stück weissen Foam mit dem Kopf ausgestanzt. Auf diesen habe ich die colorierten Stanzteile geklebt. Um noch ein wenig mehr den 3D Effekt zu erhalten, habe ich noch Schatten reingemalt. Nicht ganz sicher, war ich mit dem kleinen Stanzteil am Kinn, ist das nun Bart oder einfach eine Falte. Ich habe es dann eben mit der Gesichtsfarbe bemalt, da es mir persönlich besser gefiel. Nachdem ich den Kopf fertig habe, überlegte ich erneut und entschied die Krone anzubringen. Diese habe ich mit silbernen, Spiegelpapier ausgestanzt. So hebt sich diese ein wenig besser ab. Danach legte ich den Kopf erstmal auf die Seite und habe mich mit dem Hintergrund beschäftigt. Ich habe eine Karte A2 US Format gewählt, naja eigentlich ein Stück Papier, in der Grösse 5.5x8.5Inch und es bei 4.25 Inch gefalzt. Den Rand der Karte habe ich mit Distress Oxide Ink Ground Expresso beschmiert, da die Farbe so schön zum Kopf passt. Ich habe dann die äussere Stanze von den Quilted Rainbow Die genommen und entschieden, dass ich diese noch bearbeite, bevor ich den Kopf aufbringe. Im Hintergrund habe ich dann das Wort Jesus mehrfach abgestempelt, wobei ich immer den 2 Àbdruck genutzt hatte, ausser beim letzten Wort. Danach habe ich die Farbe noch über das Papier gespritzt. Mit einer schwarzen Tinte habe ich noch die Bedeutung dazu gestempelt, so entsteht der Satz "Jesus is the Alpha and the Omega". Dann habe ich noch einen Kreis ausgestanzt (Vellum) und den Kopf darauf angebracht. Zum Schluss habe ich noch ein paar Strasssteine benutzt. 


Products | Produkte

I link here all products, which I have used.
Ich verlinke hier alle Produkte, welche ich gebraucht habe.


Thanks for visit my blog and for your lovely comment. 
Danke vielmals, dass Du mich auf dem Blog besucht hast und für Deinen lieben Kommentar. 


Sonntag, 6. März 2022

Whimsy Stamps | The Lamb of God


Welcome to my blog.  It is time for a new inspiration.
This time I decided to use a digital stamp. It shows a girl with a lamb (Mary). It's so cute, I thought it would go well with the crosses in the background and the sentiment from the die set of the same name. 
In April we celebrate Easter. I grew up Christian and so I know the story from the Bible with the crucifixion and its meaning in life. Jesus has forgiven our sin on the cross, so that everyone who believes in him goes to heaven. 
In Europe there are also crosses on hiking trails, so here or there you can also see animals on the meadows in front of it and that makes a map a little more vivid. 

Herzlich willkommen auf meinen Blog. Es ist Zeit für eine neue Inspiration.
Dieses Mal habe ich mich für einen Digitalstempel entschieden. Er zeigt ein Mädchen mit einem Lamm (Mary). Der ist so niedlich, dass ich dachte, der passt gut zu den Kreuzen im Hintergrund und zu dem Sentiment vom gleichnamigen Die Set. 
Im April feiern wir Ostern. Ich bin christlich aufgewachsen und so kenne ich auch die Geschichte aus der Bibel mit der Kreuzigung und deren Bedeutung im Leben. Jesus hat am Kreuz unsere Sünde vergeben, so dass jeder, der an ihn glaubt in den Himmel kommt. 
In Europa stehen auch auf Wanderwegen Kreuze, so sieht man hier oder da auch Tiere auf den Wiesen davor und das macht eine Karte etwas lebendiger.


How I made this card?

That I use a digital stamp here I have already revealed. This I have printed with my printer, after I had thought about how big the image should be. Then I took a grass die cut. Now I have thought about how big the image can be, so that the crosses still fit on it. Then I printed the image again on cheap printing paper, cut it out and used it as masking. 
First I colored the sky with Distress Oxide Ink, then the crosses and finally the grass. After that I colored the girl and the lamb. For this I took my Triblend pens. Now I put the picture together and cut it with the Slimline ATC Die. The trick here is that you first cut one side, then shorten the other and again let through the machine (BigShot), so you can use Die Cuts in many ways. Behind this I still used a black cardstock to highlight it and applied the image with spacer glue. I still rounded off the edges. My card is 6x6inches in size. Here I used a snippet of a patterned paper to add another accent. Over it a gold ribbon. Still a sentiment and a few rhinestones and ready :)

Wie habe ich diese Karte gemacht?

Das ich hier einen digitalen Stempel benutze habe ich ja schon verraten. Diesen habe ich mit meinen Drucker ausgedruckt, nachdem ich mir überlegt hatte, wie gross das Image sein soll. Danach habe ich eine Gras Stanze genommen. Nun habe ich mir überlegt, wie gross das Bild werden kann, damit die Kreuze noch darauf passen. Dann habe ich das Image nochmals auf billigen Druckpapier ausgedruckt, ausgeschnitten und als Masking benutzt. 
Zuerst habe ich den Himmel mit Distress Oxide Ink eingefärbt, dann die Kreuze und zum Schluss noch das Gras. Danach habe ich das Mädchen und das Lamm ausgemalt. Hierfür habe ich meine Triblend Stifte genommen. Nun habe ich das Bild zusammengesetzt und am mit der Slimline ATC Die zurechtgeschnitten. Der Trick hier ist, dass man zuerst die eine Seite schneidet, dann die andere kürzt und nochmals durch die Maschine (BigShot) lässt, so kann man Die Cuts vielseitig einsetzen. Hinter dieses habe ich noch ein schwarzen Cardstock genutzt, um es hervorzuheben und das Bild mit Abstandsklebern aufgebracht. Die Kanten habe ich noch abgerundet. Meine Karte ist 6x6Inch gross. Hier habe ich einen Schnipsel eines gemusterten Papiers genutzt, um noch einen Akzent zu setzen. Darüber ein goldenes Band. Noch ein Sentiment und ein paar Strasssteine und fertig :)


Products | Produkte

I link here all products, which I have used.
Ich verlinke hier alle Produkte, welche ich gebraucht habe.


Thanks for visit my blog and for your lovely comment. 

Danke vielmals, dass Du mich auf dem Blog besucht hast und für Deinen lieben Kommentar.