Posts mit dem Label Magengo Design werden angezeigt. Alle Posts anzeigen

Dienstag, 23. Mai 2023

Magengo Designs | New Release | Lucky you are my Mom

  Hallo ich bin's wieder. Yay, wir haben ein New Release!
Hier kommt meine Inspiration.

Hello it's me again. Yay, we have a New Release!
Here comes my inspiration.


Nun möchte ich Euch ein wenig darüber berichten, wie ich diese Karte gebastelt habe. Die Produkte von Magengo Design werde ich am Ende des Beitrages verlinken. Für diese Karte habe ich die Masking Technik benutzt, d.h. ich habe die kleinen Elefanten gestempelt und dann mit einen Papier/ Masking Tape temporär beklebt. Danach habe ich den grossen Elefanten gestempelt. Diesen habe ich ebenfalls beklebt, um den Hintergrund zu vermischen mit Stempelfarbe. Anschliessend habe ich die Elefanten ausgemalt, mit meinen Alkoholmarkern. Nun noch zurechtschneiden und gemustertes Papier an die Ränder kleben und die Szene auf eine Karte kleben. Zum Schluss habe ich mich für ein Sentiment aus einem anderen Set entschieden und die Karte fertig gestellt. 

Now I would like to tell you a little about how I made this card.  I will link to the Magengo Design products at the end of the post.For this card I used the masking technique, which means I stamped the little elephants and then temporarily taped them with a paper/ masking tape. After that I stamped the large elephant. This I have also pasted to blend the background with stamping ink. After that I colored the elephants, with my alcohol markers. Now still trim and glue patterned paper to the edges and glue the scene on a card. Finally, I chose a sentiment from another set and finished the card. 


Products | Produkte

LUCKY YOU ARE MY MOM

 I WOOF YOU


Hier geht es zum Shop. Einfach auf das Bild klicken.
This way to the store. Just click on the image.


Vielen Dank für Deinen Besuch auf dem Blog. Hinterlasse doch einen Kommentar mit Wünschen, welches Produkt du gerne sehen möchtest, wo Du eine Idee benötigst oder einfach wie dir die Karte gefallen hat. Wünsche Dir eine tolle Zeit, bis zum nächsten Mal. 
Thank you for visiting the blog. Leave a comment with wishes, which product you would like to see, where you need an idea or simply how you liked the card. Wish you a great time, see you next time. 


Sonntag, 23. Januar 2022

New Release | I Woof You

   Hallo ich bin's wieder, Ute.  Yeah, wie cool ist das denn. Magengo hat neu eigene Stempel. Es gibt 4 Sets und eins davon werde ich heute zeigen.
Hello it's me again. This time I show you again a new inspiration on the theme..... Yeahh, how cool ist this, Mageno have new real stamp set's. There are at the time 4 different... Which one is your favorirte. 


Nun möchte ich Euch ein wenig darüber berichten, wie ich diese Karte gebastelt habe. Die Produkte von Magengo Design werde ich am Ende des Beitrages verlinken. Ich habe hier die Masking Technik genutzt, d.h. man stempelt zuerst das Bild, welches ganz darauf erscheinen sollte. Bei mir ist es der Hund. Danach stempelt man diesen nochmals auf ein Masking Papier (Beispiel Post It). Dieses schneidet man aus und legt es auf den Hund, danach wird der Korb gestempelt. Dieser wird maskiert und dann wird der Hintergrund gemacht, mit verschiedenen Distress Oxide Ink. Nun noch ein Sentiment vom Set und einen Streifen Papier aus meinem Vorrat. Fertig :) 
Now I would like to tell you a little about how I made this card.  I will link to the Magengo Design products at the end of the post. I have used here the masking technique, ie you stamp first the image, which should appear entirely on it. With me it is the dog. Then you stamp it again on a masking paper (example Post It). This one cuts out and puts it on the dog, then the basket is stamped. This is masked and then the background is made, with different Distress Oxide Ink. Now a sentiment from the set and a strip of paper from my stash. Done :) 


I Woof You Stamp Set


Hier geht es zum neuen Shop. Einfach auf das Bild klicken.
This way to the new store. Just click on the image.


Vielen Dank für Deinen Besuch auf dem Blog. Hinterlasse doch einen Kommentar mit Wünschen, welches Produkt du gerne sehen möchtest, wo Du eine Idee benötigst oder einfach wie dir die Karte gefallen hat. Wünsche Dir eine tolle Zeit, bis zum nächsten Mal. 
Thank you for visiting the blog. Leave a comment with wishes, which product you would like to see, where you need an idea or simply how you liked the card. Wish you a great time, see you next time. 


Samstag, 30. Januar 2021

Magengo Design | Robots always Love

 Hi, Ute here and today I will show you another card with the cute robots.


I used follow products:


I used also paper from my stuff (MFT Dots and Stripes), Watercolor (Van Gogh), Sentiment (from Simon Say Stamp Love Always) and heart embellishments (Buttons Galore and More).


Hope you like this idea ;)

Happy weekend and a wonderful new week... the first month will be gone so fast. 

Crafty Hugs Ute

Samstag, 16. Januar 2021

Magengo Design | Love everything about you

 Hi crafty friends!


Do you see the wonderful Robots in Love stamp set? Isn't it super cute?
I thought to use only one stamp and color them with my Aquarell colors.


I use a CAS style, also a no line technique. I think, that the robot stay out of this rainbow background. My sentiment is from Simon Say Stamp (Delicate Flowers).


I add to the eyes balls, so it looks a little cuter, if he can see right. I love the way you can add some details. You can add other forms of eyes too, maybe > < or something else. 

I use follow items:


I use also watercolor/ Aquarell colors from Van Gogh and a sentiment from Simon Says Stamp, Delicate Flowers

I hope you like this week inspiration. Can't wait to see your idea's. 

Sending Hugs and great wishes to you and your family. 

Samstag, 2. Januar 2021

Magengo | Happy Winter

 Hi, Ute here with another card from the beautiful card set Happy Winter. 

I wish you all a wonderful start into the new year. I hope this will be a better year, as the last one. 


I colored last week two cards on craft stock and one is this here. It makes so much fun and the color's looks really bright. The sentiment is German and means "You will alway be younger than I". My sister celebrate her birthday tomorrow and I want to send the card, but I forget to send it to the right time. 

I definitely need a tool, that I don't forget birthdays ans send it to the right time. I have a planner, but this works not so for me. I am still searching ;)

I used follow product: 


also a sentiment from Stampin UP, called Geburtstagsmix.


I hope you like this idea and see you soon. 

Hugs Ute


Samstag, 12. Dezember 2020

Magengo Thank you snow much

  Hi,... It is Saturday and not far about Christmas. 

It is time for a new inspiration for you.


This time I will show you a winter scene. 

You need follow product for this card:


time for coloring, I used here Alcohol Marker. 


How I make this card?

At first I arrange the critters nearly on the bottom from my card base. I use Alcohol friendly paper. For my coloring I followed a tutorial from Sandy Allnock. So this card is a practice... Ok, I am know it is not perfect, but looks like a scene.  

Hope you like it.


Giveaway

Magengo give a way two wonderful stamp set. Don't miss it!


How you can win?

Follow the instruction on Facebook or Instagram in the link below. Click on the picture to find the way.

Facebook


Instagram 


Good luck :)


See you the next Saturday again with a new inspiration.

Crafty Hugs Ute

Samstag, 5. Dezember 2020

Magengo Snowflake Background Slimline Card

  Hi, today I want you show a quick card.


You need follow product for this card:

1. Snowflake Backgrounds
2. Glitter Paper, I use Pixie Dust from Lawn Fawn
3. white card stock size 8.5x7Inch, score at 3.5Inch
4. a Plotter, I use my Scan and Cut
5. Distress Ink and Blender brushes or Blending tool
6. Water or Water color is optional for give the background details, also a heat tool
7. glue 
8. use a sentiment form you choice, I use Stampin UP "Schneeflockenwünsche" 
(means Snowflake wishes)


How I make this card?

At first I load my SVG file to my work space on the PC and send it to my Brother machine. Then I add the glitter paper to the mat and feed the machine. I search the file and follow the instruction to cut the image. I cut both images the slimline and the other. So my machine needs 9 min to cut all. After cutting I take carefully the snowflake cuttings from the mat and save this for later. 

I use the paper and score it at 3.5Inch and use my bone folder for a better folding. After this I distress the paper with only 2 Distress INK Oxide- I used Mermaid Lagoon and Blueprint Sketch and distress the background. As next I use a water spray and going over the card. For the golden sprinkles on my card I use an old box (from my mail) and put the card into the box, then I use the watercolor GOLD. 
After this I use again my heat tool for dry. 

I use the precut Snowflake Background and glue it to the card. 

I stamped my image to a white card stock and use a fishtail die from my stuff to cut it out. I add the image with foam tape to the card and finished it.


Thanks for visit and for your lovely comment. 

Wish you a wonderful pre Christmas time and let you inspire. 

Can't wait to see your cards. 

Hugs Ute


Samstag, 17. Oktober 2020

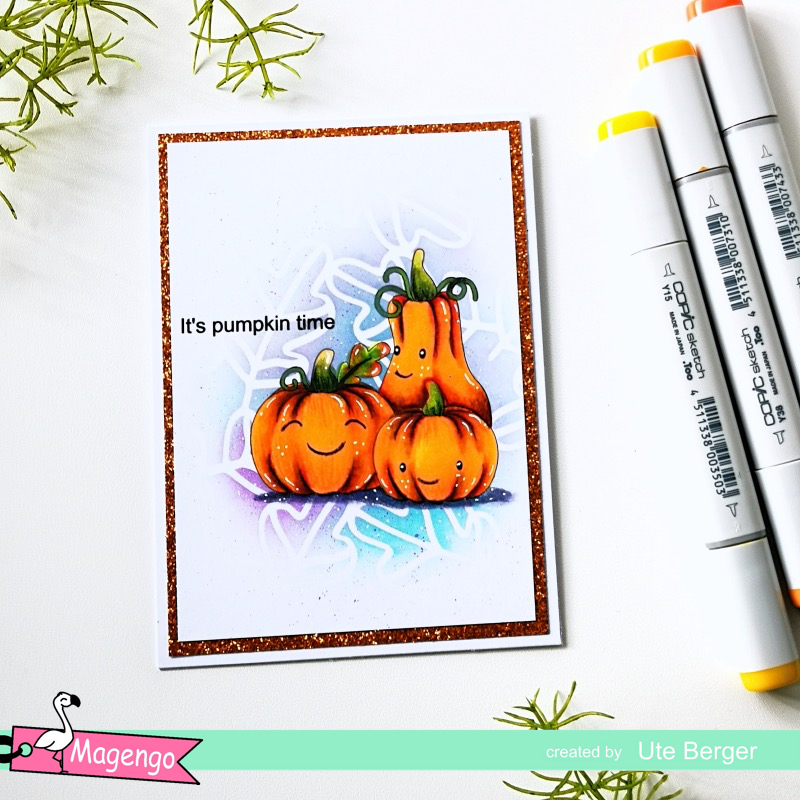
It is Pumpkin Time

  Hi again, a new inspiration from me. 

Do you remember from the inspiration last week? I show you a slimline card with a lot of pumpkins. They are so super cute I must make another card. This time I use also the Stencil from the current New Release. 


I am not a fan from Halloween, so I am glad this is a really great stamp for the fall time. 


How I made this card?

At first I arrange all images in my program and print it on card stock. This time I used the Leave stencil the first time. It is a little tricky to find the right material for the stencil. I use Acetat foil, but this is not thick enough for me, I think I will use laminated foil next time. The Acetat is thin, so I used no permanent glue spray for the stencils and for my masking (print on regular paper and cut it out).
After masking the image I use the stencil with my Distress Oxide Ink, but only around the image. not the whole card. After distressing I color the pumpkins with the same color combination like the week before.

I use an A2 card base for the card and add there a glitter paper. On the glitter paper I add the image in a smaller rectangle and finished the card.

Products I use: 


Hope you like it. Wish You a wonderful weekend. 

Crafty Hugs Ute


Samstag, 10. Oktober 2020

Autumn Greetings

  Hi there...


Today I will show you one of the cutes pumpkin stamp sets I ever saw. This set is perfect for cards around the fall time, thanks giving or birthdays or recipe cards. 
You see I have many ideas to use this set. 

This is my card I made as inspiration for you. 


How I made this card?

At first I arrange all the pumpkins I like on my card stock. I use pages for this, but you can use another program, like word for example. After then I print it out and colored the pumpkins. 
I use my Copic Markers for this.
Pumpkin: R29, YR18, YR04, Y38, Y15
green: YG67, YG 25, YG00
for shadow a pencil from Luminance, called Dark Indigo (639). For more details I used a white gel pen. I also print again the pumpkins on normal paper, for masking. So I cut all out and use a non permanent glue spray for hold the masking on the images. I use Distress Oxide Ink for the background (twisted citron, mowed lawn, tumbled glass, peacock feathers, seedless preserve) . I use my die cut from Mama Elephant Slim card basic and cut the pumpkin scene and I use als the scalloped cut die with glitter paper. I prepare a card size 3x8Inch and glue it on the back. At last I use another die cut from my stuff (Moda Scrap fustella flags)


I hope you like my card. 

Crafty Hugs Ute


Dienstag, 8. September 2020

Hallo Card

Today I want to show you a card with different products from the current New Release from Magengo Designs.

This is my inspiration:

How I made this card?

At first I arrange the bears on my card and after the word HALLO (the German Hello)... I print it on withe cardstock. Now it was time for coloring.  I use my prefer brand on coloring pencils, Luminance (Swiss made by Caran d'Ache)... They are soft and colorful, similar like the Prismacolor Premium. 
I decided to give the balloons the little girl bear. So I draw some lines in her hand. I try to color the balloon letters like balloons, here I get my inspiration from the internet. I was search to balloon letters and try to color like real... After coloring I get Glossy Accent to the letters and after dry I add the withe line. So it looks like real balloons. I add also a few withe dots on the bears as details. 
I cut the card a little smaller and add it with foam tape on my A2 (US format) on the card base (I use a brown colored cardstock). 
At last I draw a stitched line by hand on the card, so it isn't straight, but handmade ;)


Today I use follow products: 


I hope you like my card or inspiration. 

Crafty hugs Ute


Samstag, 22. August 2020

Magengo Designs Butterfly Gift Bag

Today I want to show you a little gift bag...


What do you need?

I used follow products for this project:


How to make the gift bag?

I use white card stock for this idea. I open my working space for my Scan and Cut from Brother, Canvasworksspace. There I opened the box die and delete the butterfly, so I have only the gift bag.  I cut it out and save the small little butterfly. I fold and glue the bag together. 
I color the butterfly with my Karin Brushmarker in blue colors and add a glitter pen on this. I decided to add also Glossy Accent for a shiny effect. 

I print out different Geranium flowers and color it with my Alcoholmarker. After than I fuzzy cut it out and glue it on the bag with foam tape. 

I add a German sentiment (from Create a Smile, Krokusse). This means you are a special plant..., this mean something like you are wonderful...

I hope you like this inspiration. Have fun to try this and I can't wait to see you idea.

Crafty Hugs Ute

Mittwoch, 1. Juli 2020

Warning it's a circus in here

Hi, I want to share a card with the Circus theme...  I made with follow stamp set:


If you have kids you think sometimes you have the circus in your own family ;)

I made this card.


How I made this card?

At first I cut out the stamp set and color all in with my Copics. After this I fuzzy cut it out and arrange it to the card... I love the seal is playing with the ball. 
So I used my Basic shapes from my stuff to cut out the rectangle and a circle hole. On tne base card I decided to use my Distress Oxide Inks and a stencil from my stuff to create the background. The white panel on the white card looks a little boring, so I decided me to change the color on the border. I use an embossing powder for this and add the white rectangle on this with foam tape. 
Than I add the critter, ball, tickets and sentiment and finished the card with a little glitter on the seal and the ball. 

I hope you like this idea and I see you again with the next idea. 

Crafty Hugs Ute


Samstag, 20. Juni 2020

Magengo Design, Ahoy, let's have some fun

Hello, wish you a wonderful Friday! I want to show you my second card with the wonderful pirate stamp set. 

 
This time I decided me to use the pirate ship as focus. You can print it taller, if you like it, but I used the stamp set, which called "ready for print page.jpg". There are all images from this set. 


...and this is my card. 


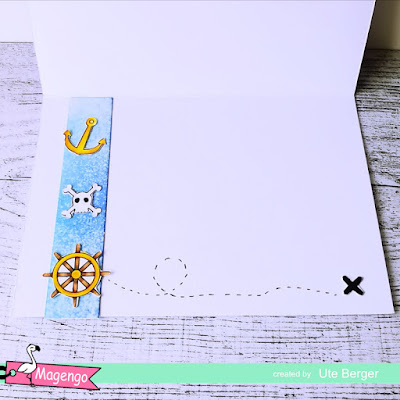
...and here you can see the inside card... I also use items for a detail pirate card. 


How I made this card?
At first I print out the stamp and color all with my Copic's. 
ship: E47, E44, E33, 
pirate sail: C5, C3, C1
other sails: B34, B32, B000
golden tone: Y38, Y15, Y11
pull eye: Glossy Accent
I distressed my card base with 3 different Distress Oxide Inks. I used an additional card stock in the same size, like the card and tear it in a wavy form to made the water optic. I draw some white dots for stars and add a little glue to the wave and the sky, to bring in golden paper/ flakes.  I think pirate theme have to need a golden detail... I used on this card two sentiments. 

The inside I use again a strip paper from my trash and distressed this, only with two colors. I glue it into the card and add some detail stamps from the set. I draw a line to the cross and finished it.  


I hope you like this inspiration. 

Crafty hugs Ute

Samstag, 13. Juni 2020

Magengo Designs, You made my Day

 Today is Friday the 13. and for some people a bad omen/bode, but why?
If it the number or the combination number and day or something else? I don't know. 
I hope you will have a fantastic day.

I will show you a card from follow stamp set, called Pick a Boo.


This s a wonderful set with a lot of critters and details. I also love the sentiments. 

This is my inspiration a CAS card. Here you can see the front and the other picture shows the inside of the card. 


How I made the card?
At first I print out the whole set and colored it with my Copics. After than I cut it out.  I try a few combinations and after this I decided me to use a treat for this card. So I draw a light circle line on my card. I used the circle from my dopple side glue tape, but you can all use, what is round and have a similar size. I am not sure if you know it, but I love the Hybrid Dual Metallic Pens. This are pens, which color different on white paper or black paper, for example the purple is purple on white background, but blue on black. If you haven't this pens at home, no matter, you can also use another pen, that you prefer. I draw the leaves and add a few details. I add the sentiment and used my scissor to made a fishtail end on both sides. The banner is in the same white, so I distress it a little bit, so it is darker now. At last I decorate the inside card.

Thanks for reading this post and I hope I have inspire you. 

Wish you a wonderful weekend and a happy day. 

Crafty Hugs Ute
 

Freitag, 5. Juni 2020

Magengo Design Pirate


Happy Friday Friends! Today I will show you one card I made with the very cute pirate stamp set. I love this, because there are so amazing critters and details on the set. 


I fall in love with this stamp set, as I see it at first. OMG so wonderful critters, items, palms, a pirate boot and so on. I have a lot of picture in my head to play with this great set. 

I thought it will cool to print out the whole set, to made a few cards, but I will definitely use this stamps set again, maybe to use the palms taller or ...

At this time I made two cards. One I will show you today and the other later in the month. 

This is the one I will show you today: 


How I made this card?
If you make an order, you get jpg, png and svg files. you will find in the jpg and png files a picture with the whole stamp set. I used this to print out on alcohol friendly paper. 
Than I used my Copics to color them out. I used also a white Posca for bring in details. 
Than I cut all out with my Scan and Cut, you can also use the svg files for this. 
For my card I used Distress Oxide Inks. I use two different blues and put it on a plastic sheet/ laminated. I used my finger to smudge this a little bit and spray water on this. I use a white background to put it on the wet sheet and take this away for the water effect in the back. 
Than I used also white paper to made the beach. I tear of the paper a little wavy form. Than I used again Distress Oxide Ink to bring a beachy color on this paper. I use my water bottle to bring in a little structure and use a darker one for made a more sandy feeling.

Now I arrange the critters and the background on my card to made a treasure hunt perfect. 

At last I decided me for a golden and black detail on the card and finished it. 


Hope you have understand all, otherwise let me know.

Crafty hugs Ute

Samstag, 21. März 2020

Magengo Design No Glue Butterfly Box

I will show you today another fun project. 

This time I use follow product:


This is the Butterfly No Glue Box cutting file.

How do I cut?

My husband have my Silhouette in his store and I have a Brother Scan and Cut machine at home. I wasn't sure, if it works with this machine, but I am so happy that it works perfect. 

I opened the software from Brother, called canvasworkspace.brother.com/. This is a free online tool and I opened the svg file there. I delete at first the butterfly extras, because I want to cut the box first and send this to my machine. I saved the new form on my machine, after than I made the same, but this time I saved the butterfly details. 
Normally I color stamps, so I am not professional for cutting things, like this ;)

How do the box?

It is really easy. I try it first with my card stock paper (white). After cutting I fold all lines. 
I made one mistake to close the box and at last the butterfly, but this doesn't work, it broke. 
Hmmm, another try and voilà a perfect box... 
I am so happy, really it works with no glue... 
Great idea.

My inspirations


this are my first boxes. I cut  the box with white card stock and the butterfly details in gold and blue glitter paper... I glue at first the outside butterfly on my box and after than I used the other paper pieces to fit into the butterfly... 


Hmm, how looks a box with a black glitter outline? So I made this simple box. How will look the butterfly on a card? I use a A2 (US format), paper cut the butterfly details in glitter blue and used the paper pieces from the black one. I glue it on a white card stock and fuzzy cut it out. After than I draw a butterfly body into the mid and glue the fly's only to the body side on the card, the other one are lift a little bit. At last I used a sentiment from my stuff. 


Now I try colorful paper for my next project. 


This time I use a colorful card stock from my stuff and decide to made the butterfly black and white with glitter paper. It looks so wonderful with  the glitter effect.


I have also other butterfly dies at home and this time I decide to use a cutting body for the butterfly not only on the card, rather on the box too.  This time I used my Xron for glue the pieces, this is efficient and clean, as with glue ;)


On the card I use a strip pattern paper, the same like for the box and add a black wooden strip behind, so it's pop a little bit. I use also a sentiment from my stuff.

I hope you will like this cutting file and you can really made a lot of fun boxes or cards. 

Wish you a wonderful crafty weekend.

Hugs Ute